
How to fix a leaking toilet: A 5-step DIY guide
Discovering a leaking toilet in your home can be extremely frustrating. You never want to worry about water leaks damaging your floors and causing a mess of everything else in the bathroom.
Fortunately, knowing how to take care of this common plumbing problem quickly can help minimize damage. Let’s explore some common reasons toilets leak and what you can do to fix the problem.
Why do toilets leak around the base?
There can be a few different reasons you might see a leak around the base of your toilet.
To fix the problem, you must first identify the source. Let’s discuss a few of the most common problems you might encounter.
Toilet condensation is collecting on the floor
Discovering water on the floor around your toilet might direct your thoughts toward an internal leak, but the problem could be simple condensation.
Toilets collect water, which can make them cool to the touch. If your bathroom regularly becomes warm and humid — like when someone takes a long, steamy shower — the excess moisture in the air can collect on the outside of the toilet as condensation. This condensation then drips down the outside of the toilet and collects at the bottom.
To correct this problem, make sure your bathroom has a quality exhaust fan. You can also try leaving the door open more often to reduce moisture in the bathroom.
Your toilet is loosely attached
If you look carefully around the base of the toilet, you’ll see that it attaches to the ground with bolts that hold it into place. Loose toilet bolts can cause water to leak around the base. Tighten or replace these screws so water can’t escape underneath.
A faulty toilet seal is leaking water
The sewer pipe that empties waste is underneath your toilet. A wax ring connects the bottom of your toilet to the sewer pipe and the closet flange underneath. The closet flange is a metal ring that you can see over the drain.
However, wax toilet seals can begin to wear down over time, which can result in water leaking from underneath the toilet. Repair or replace the wax ring to create a tight seal and fix the issue.
Tools you’ll need to fix your leaking toilet
Prepare to fix your leaky toilet by bringing together all the tools you might need. This will ensure you don’t have to run off for a new tool in the middle of your project, allowing you to work more efficiently.
Make sure you have access to the following before beginning any toilet repairs:
- Gloves and protective gear
- Wrench
- Bathroom cleaner
- Cleaning cloths
- Screwdriver or a cordless drill if you have tight bolts
- Replacement parts you might need, including washers, gaskets, a wax ring and bolts
- Putty knife
- Caulk
- Hacksaw for any bolts that might be stripped
How to fix your leaking toilet in 5 steps
After you gather your tools, there are five steps to follow to fix your leaking toilet.
We’ll walk you through each step so you can give your toilet a thorough inspection and feel confident you corrected the problem.
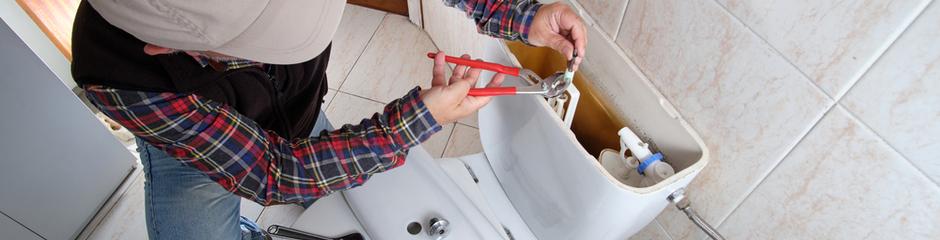
Step 1: Check the connection bolts
One of the first areas to check when working on your toilet is the connection bolts where the tank meets the toilet. Remove the plastic caps and make sure they haven’t become loose. Check each individually with your screwdriver. If any bolts have become loose, tighten them and dry the water. You’ve likely solved the problem if the water does not return after 15 to 30 minutes.
If the leak returns, turn off the water to the toilet at the shut-off water valve. Hold down the handle to drain the water from the tank. Once you’ve emptied the toilet, remove the old bolts and washers and replace them with new ones. Absorb any standing water left around the toilet. Turn the water back on and let the toilet refill.
If you replace your bolts and the toilet still leaks, move on to the following steps.
Step 2: Disconnect the toilet
If working on the bolts hasn’t solved the issue, you’ll need to move the toilet itself. Shut off the water supply, drain the water from the tank again, and use a plunger to get any water out of the toilet bowl.
Next, slowly disconnect the toilet. Start by removing the water supply line. Then loosen the bolts that hold the toilet to the bathroom floor. Gently rock or wiggle the toilet to break its wax seal and lift it. Put a rag in the sewer pipe and ventilate the area once you have removed the toilet.
Step 3: Remove and replace the wax ring
Use your putty knife to help unstick the old wax ring from the bottom of the toilet. Make sure none is left on the flange. Be sure to thoroughly remove and clean any residue from the old adhesive so your new wax ring will have a good seal between the toilet and the pipe.
Place your new wax ring over the flange and gently press it down.
Step 4: Put the toilet back
Next, lift the rag out of the sewer pipe and place it in a closed bag for sanitation purposes.
Gently set your toilet back into place, carefully lining it up with the bolt holes. Once all of your toilet bolts line up, press down on the toilet to create a watertight seal between the toilet, the ring and the pipe.
Once you create the seal, replace your washers and bolt nuts on both sides of the toilet, alternating sides. Don’t tighten them too much or you’ll risk cracking the toilet. Place the plastic covers back over the bolts.
You can now caulk around the base of the toilet. Once you’ve thoroughly resituated the toilet and the caulk has dried, reconnect the water line and turn it back on. Allow the toilet tank to refill and then flush. Check carefully for any leaks.
Step 5: Clean the area thoroughly
After you finish fixing your toilet, carefully clean any excess water and disinfect the entire area to keep it sanitary. Clean the toilet seat and inside the toilet because bacteria likely spread while you moved the fixture around.
Pay particularly close attention to the floor where you were working. Use a disinfecting cleaner to ensure the bathroom is ready for use again.
Is your toilet leaking? When to call a professional vs. DIY
Although many homeowners can manage the DIY process of fixing a leaking toilet, there are times when you’ll want to call in a professional.
Here are some instances where calling a professional plumber would be best to fix your leaky toilet:
- If you have trouble removing the toilet
- If the toilet does not come off as designed
- If the top of the sewer pipe is broken or cracked
Damage to the pipe will need to be repaired correctly to prevent significant water damage to the floors where the pipe runs.
Help protect your home from costly repairs with Cinch
Knowing how to manage minor problems with your plumbing system can help keep your home clean and protect your floors from water damage.
However, if something bigger than an easily fixed leaking toilet goes wrong with your home, consider the security that comes with the Cinch Built-in Systems plan. This plan covers toilets and other aspects of your plumbing system in the event of a breakdown from normal wear and tear.
Contact us for a service repair if you have a covered issue with your toilet. We’ll put you in touch with a local qualified, vetted technician who can help you get the problem straightened out. Contact us for an instant quote today!